
Log into Encore
Log In
Open up your Chrome browser
Type in Encore.Atlantic.ca
Chrome
Add the website address as a bookmark
- Click on the
 icon at the right of the screen
 - From the menu, select bookmarks
- Select “Bookmark this page
- Edit the bookmark
- Trim the URL up to the question mark
- Change the name of the bookmark to Encore
- Click on “Save”
Zoom Screen Size
Click on the icon at the right of the screen
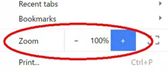
Besides the “Zoom”
- Click on the “+” to increase the size or CTL +
- Click on the “-“ to decrease the size (view more on-screen) or CTL -
- Click on the to enter full-screen mode or F11
- F11 to return to normal
Turn Off AutoFill
Click on the icon at the right of the screen
From the menu, select settings
Under Autofill, click on “Addresses and more”
Click on the  to turn off
Log In Screen
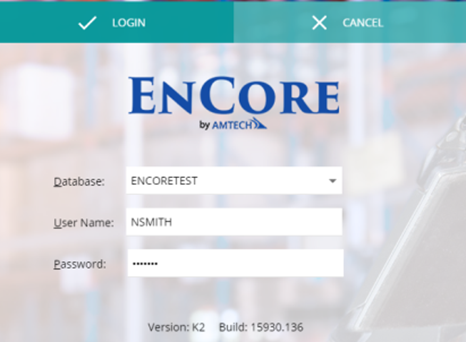
Enter your User Name and Password
Click on the “Login” button
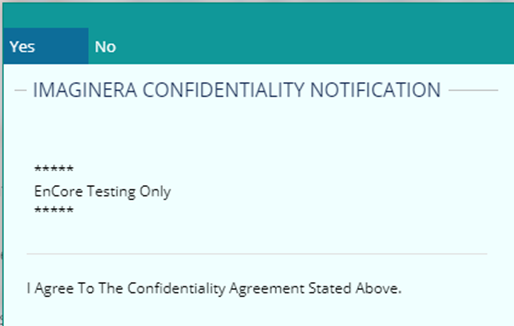
A warning is displayed, click on “Yes” once you agree on confidentiality
Set Up Your Home Screen
Quick Links
These are shortcuts to applications or specific screens
- Click on the “Home” icon
 to view your quick links
 - Go to the page that you want to create a quick link for
- Click on the house on the right-hand side of the screen
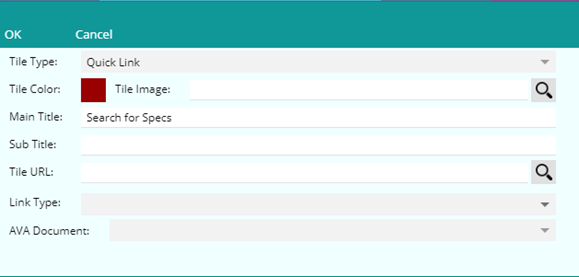
- You can now change the properties of the link:
- Tile colour – click on the coloured square to select tile colour
- Tile Image – click on the magnifying glass
- Under Images à Images4HomeTiles, highlight image
- Click on “OK”
- Main Title – enter the name that you want to use for the link
Once the tile has been created, you can click on the icon on the tile to resize (double arrows), edit (pencil), move (square with arrow) or delete (garbage can)
Add an alert
A quick reference to see alerts such as orders awaiting dies, late orders, past due orders and more
- Click on the “+ Add Alert” button at the top of the screen
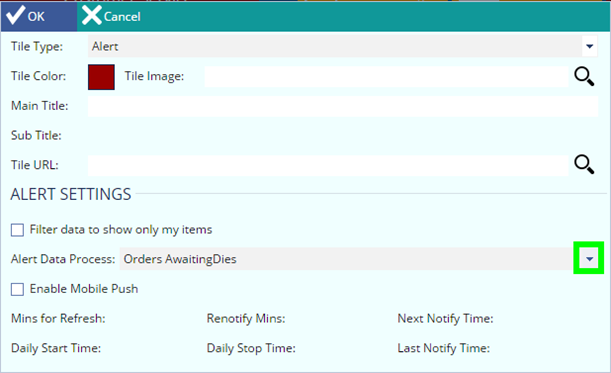
- Select the Alert Data process by using the drop-down box. Currently limited to the alerts that are in the drop-down box.
- You can also change the colour, icon, and title of the tile
- Click on “OK”
- Click on “+ Refresh”
- Once the tile has been created, you can click on the icon on the tile to resize (double arrows), edit (pencil), move (square with arrow) or delete (garbage can)
The alert does not take you to another screen. It is information only
Add an independent link
Quick access to a web page
- Click on the “+ Add Link” button at the top of the screen

- Enter the URL for the website
- You can also change the colour, icon, and title of the tile
- Click on “OK”
- Click on “+ Refresh”
- Once the tile has been created, you can click on the icon on the tile to resize (double arrows), edit (pencil), move (square with arrow) or delete (garbage can)
Quick Search

- Click on the three dots
- A screen much like the QBE screen will pop up
- To add a field to the quick search, right-click on the field name (field name will turn red)
- Click on “Close”
- Enter search text. The search will look for that text in any field that you selected for a quick search.
- Click on the magnifying glass to start the search
- “%” is still the wildcard
 When you see the funnel above the three dots, it means that you have saved search criteria
Navigation
Icons

 Context Menu –Right-click functions
 Double Click – Rather than double-clicking with your mouse, you can click on this icon
 Add – This will open up a new line to enter data
 Export – Exports the grid to excel
 Report – creates a report from the grid that you are on
 Reset
Reset
 Maximize Table
 Minimize Table
 Erase
Erase
 Erase
Erase
 Previous Record
 Next Record
Managing Grids
Resize a column
- Click and drag the column side
Relocate a column
- Click the column name and drag it to where you want it
Hide columns
- Click on the icon
- Select the column to be hidden and then click on the right arrow to move the column to the right-hand side under “Hidden Columns”.
- Click on “OK”
Move Columns
- Click on the icon
- Select the column to be moved then click on the “Top”, “Up”, “Down” or “Bottom” button
- Click on “OK”
Reset Columns back to the default
- Click on the icon
- Click on “Reset”
- Click on “Yes” to “Resetting the table columns to default will require closing the form. Close the form?”
Sort any Column
- Click on the column heading to sort ascending
- Click again on the column heading to sort descending
Columns will stay the same when modules are upgraded
When using the icon, you must close the form and reopen it
Drop Down Menus

- Each of the above is drop-down menus to access the various sessions just like the buttons on the Amtech main menu
- Click on the session to open
- Profile Drop Down – here you can set your printers, view the print queue, change your password, complete training in the training portal and open another session
- Logout – logs you out of EnCore
Menu

Session specific options
 Mega Menu
- when in doubt click on the mega menu
- If you cannot find what you are looking for, chances are that it is under this menu
- Click anywhere other than within the menu to exit
Tabs

You can have multiple tabs open at the same time.
To reorder the tabs, drag and drop the tab
To close a tab, click on the X on the right side of the tab
To close all tabs, click on “Close All” in the dark blue band
To access the tabs, you can also use the drop-down list in the dark blue band
To tile the tabs, click on the  icon at the far right of the screen
Printing
 Export to Excel
 Download as PDF
 Copy Report to URL
 Pin
Pin
 Maximize
 Close report
 Zoom out
 Zoom in
 Rotate
 Download to a file
 Send to printer
Scroll down to view the report
Dates
In any date field, you can use the following shortcuts:
- T Today
- + ahead one day
- - minus one day
- W beginning of the week
- K End of the week
- M beginning of the month
- H end of the month
- Y beginning of the year
- R end of the year
- Double Click brings up a calendar
Comments
0 comments
Please sign in to leave a comment.